 Lasse Bjerre
on
#python
#electronics
#raspberrypi
Lasse Bjerre
on
#python
#electronics
#raspberrypi
At home we have a doorbell that does not have sufficient range to be placed anywhere in the house, and it can be pretty difficult to hear when you are far away from it (or listening to music for that matter). I thought it would be pretty cool to have your smartphone alert you when someone is ringing the doorbell to avoid those issues; you have your phone on you at all times anyways. I figured this could be done with my Raspberry Pi, and indeed it could. You will need the following to complete this project
- A Raspberry Pi, it does not matter which model.
- A WiFi dongle. This will make it much more convenient since you don’t have to worry about Ethernet cabling.
- A wireless doorbell. Anything that has an LED that lights up / blinks when someone rings the door will work.
- Additionally, you need to make sure the doorbell runs on a pair of AA batteries. This makes sure that it runs 3V, which avoids us having to do all sorts of complicated things to make it compatible with the Pi.
- Last but not least, a soldering iron and a pair of wires.
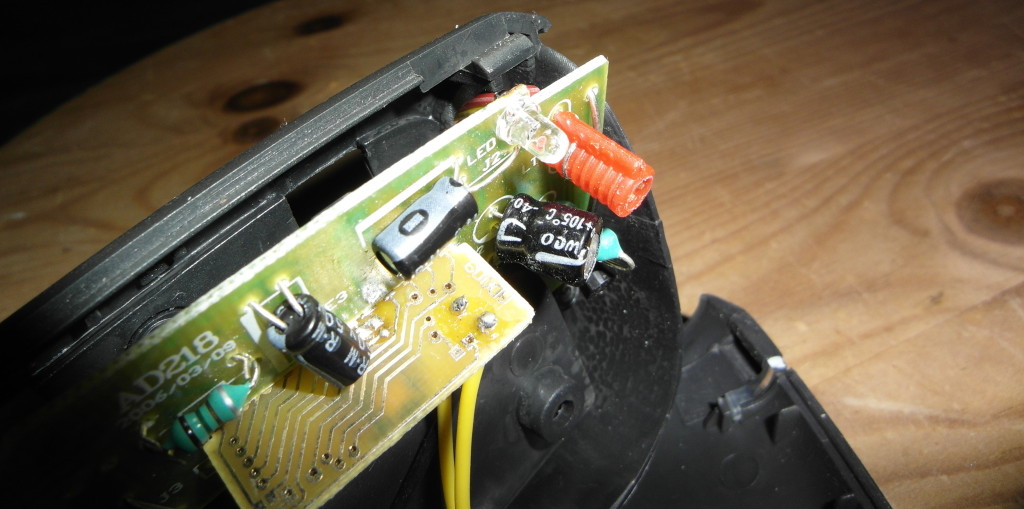
The general idea of this project is simple. Since the voltage and everything of the LED on the doorbell is compatible with the Raspberry Pi GPIO pins, we simply attach two wires to the LED, and then attach those wires to the Raspberry Pi. When someone rings the doorbell, the LED blinks and we receive a signal on the GPIO pins. We then have a python script that picks that up and notifies our smartphone. Let’s get started! First step is to open up the doorbell. Mine was incredibly easy to take apart, it simply had two screws behind the batteries and two holding the circuit board in place. Once taken apart, look for the LED. You should have a pretty good idea of where it is since it is visible on the outside.
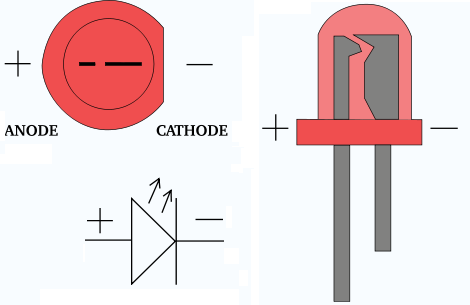
Next step is to solder the two wires to the LED pins. This is not very difficult, the only thing you need to make sure is that you know which pin is the anode and cathode of the LED. This is very simple to find out, simply look inside the LED. The bigger pin is the cathode and the smaller one is the anode. If you are in doubt, use a multimeter to find out.
Now that you know which is which, solder the two wires to the LED pins. It’s always a good idea to color code stuff like this, so I chose a red wire for the anode (+) and a yellow one for the cathode (GND).

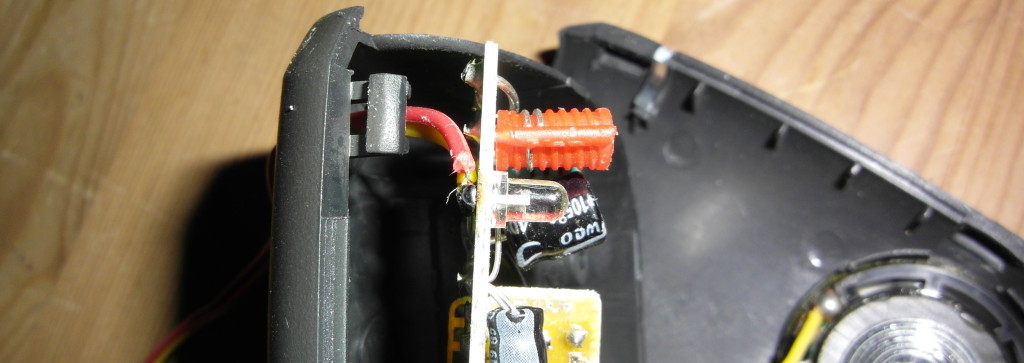
Now that we have the wires attached, we can close the doorbell up. Mine had a very convenient hole that I was able to route the wires though, but if yours doesn’t, you can simply make one.

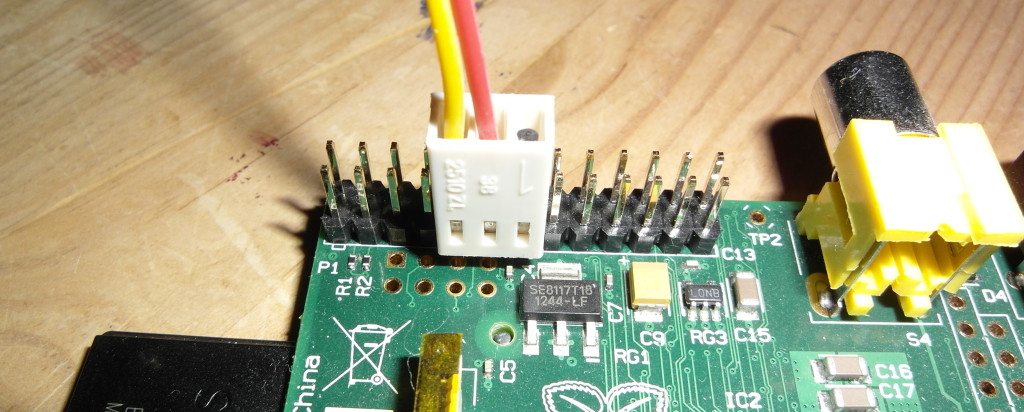
When everything is closed up, you can connect the wires to the Raspberry Pi. The wire attached to the anode (red wire in my case) needs to go to a GPIO pin, and the wire attached to the cathode (yellow wire in my case) needs to go to a GND pin. GPIO 17 is perfect for this since there is a GND pin just above it, this makes it look neat.
Once everything is connected, you can go ahead and start up your Raspberry Pi. Before we start on any python code, we need to make an account at pushover.net. Pushover is the service I chose to deliver messages to our smartphone when someone rings the doorbell. The Pushover app (Android / iOS) is unfortunately something you have to pay for, but I think it is very worth it. Their API is amazingly easy to use, and compared to other free alternatives, they are superior to me because of that. I also believe they are the only ones who support iOS, but I could be wrong. Once you have created an account and logged in, you should be taken to your dashboard. Here you can see all the devices and applications you have. You now need to register a new application, this should be pretty self-explanatory. Once you have registered your new application, note down the API Token. You can find this on the page for your newly created application. Also note down the User Key on your dashboard. You will need both of these in the python script. Without further ado, here is the python script I am using
import RPi.GPIO as GPIO
import time
import os
import httplib, urllib

#if you do not use the GPIO 17 pin, change this accordingly
buttonPin = 17
GPIO.setmode(GPIO.BCM)
GPIO.setup(buttonPin,GPIO.IN)

def alert_action(channel):
    print('Signal detected on GPIO %s'%channel)
    if channel == buttonPin :
        conn = httplib.HTTPSConnection("api.pushover.net:443")
        conn.request("POST", "/1/messages.json",
            urllib.urlencode({
                "token": "your_application_token", # Replace this with your application / API token
                "user": "your_user_key", # Replace this with your user key
                "message": "Someone is at the door!", # This is the text that is displayed on your phone when someone rings the doorbell, you can change this to whatever you like
            }), { "Content-type": "application/x-www-form-urlencoded" })
        conn.getresponse()

GPIO.add_event_detect(buttonPin, GPIO.RISING, callback=alert_action, bouncetime=200)

while True:
    time.sleep(1)

GPIO.cleanup()
In the above script, you need to change a few things. Firstly, if you do not use GPIO 17, you need to change the buttonPin variable to match the one you are using. You also need to change the API token and the User Key, I commented those in the code. Once this is done, save the script to something like doorbell.py and run it. Now try to press the doorbell button. Assuming you installed the app on your smartphone and set everything up correctly, you should now receive a notification with the message you made in the script! I think this was a fun little project, and it turned out great in my opinion. My goal was to make this as simple as possible. No features that are not needed, just a notification on my smartphone.